Project Creation & Enable API Access in Google Cloud Console

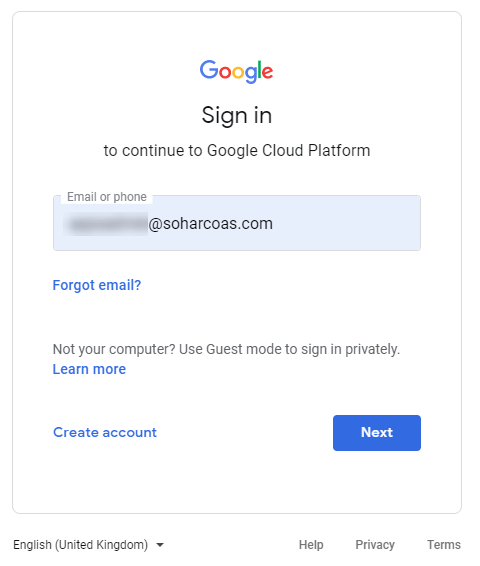
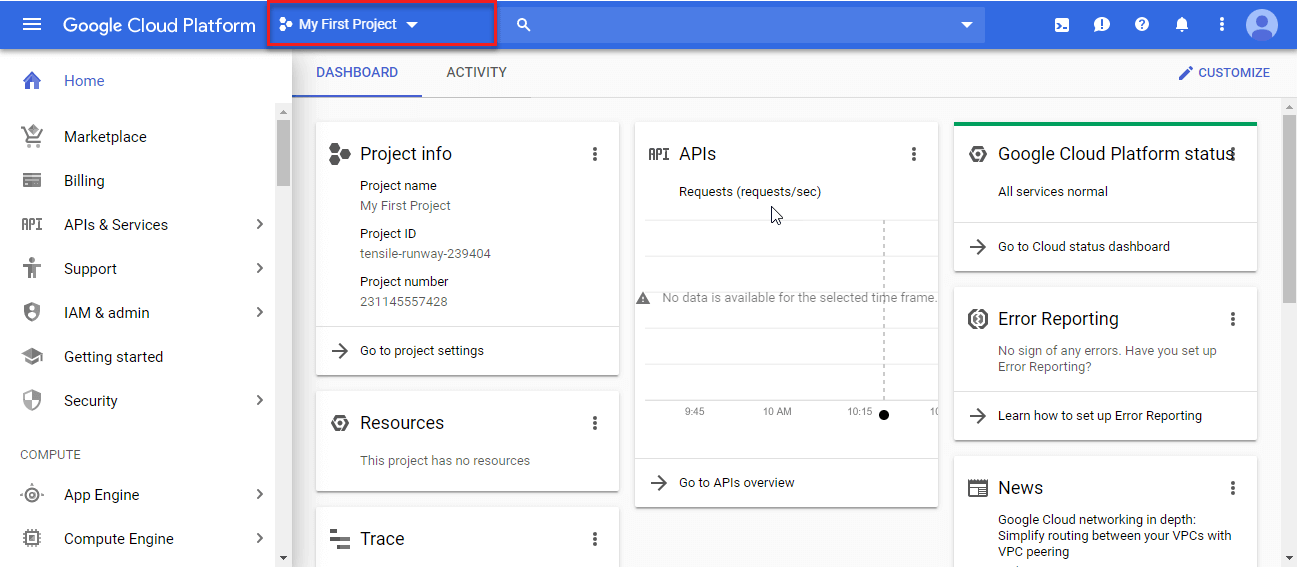
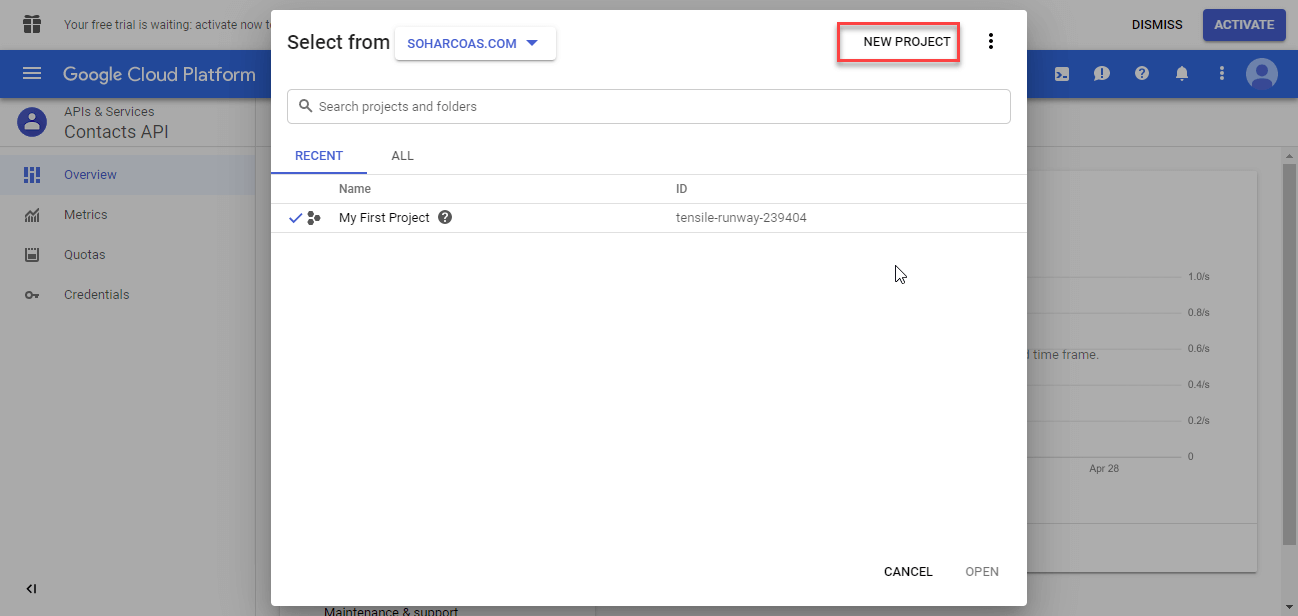
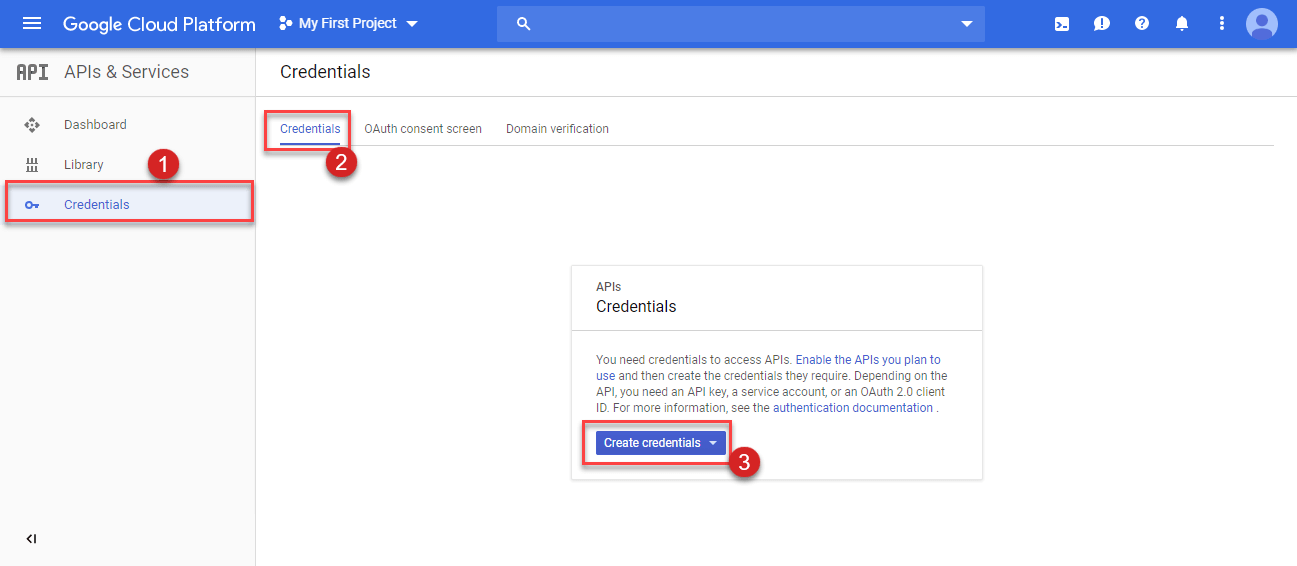
Now following this step-by-step guide to Create Project & Enable API Access in Google Cloud Console

STEP 1

Go to the Google Cloud Console to create new project.

Google Cloud Console login


Google Cloud Console


STEP 2

Select the NEW PROJECT option. Then Enter the project name and click on Create button to generate new project.

new Project


Create Project


STEP 3

Go to the Navigation Menu from the left hand side. Then click on the APIs & Services and select Credentials.

APIs & Services option
STEP 4

Choose Credentials from the navigation menu and click on Credentials tab. Then select Create Credentials.

Create Credentials
STEP 5

Select the Service account key option from the dropdown list.

Service account key
STEP 6

Select New service account. Provide any Service account name and click on the Select a role option.

New service account
STEP 7

After that select the Project option and choose Owner from the dropdown list.

Owner option
STEP 8

Choose the P12 from the Key type and click on the Create button.

Key type
STEP 9

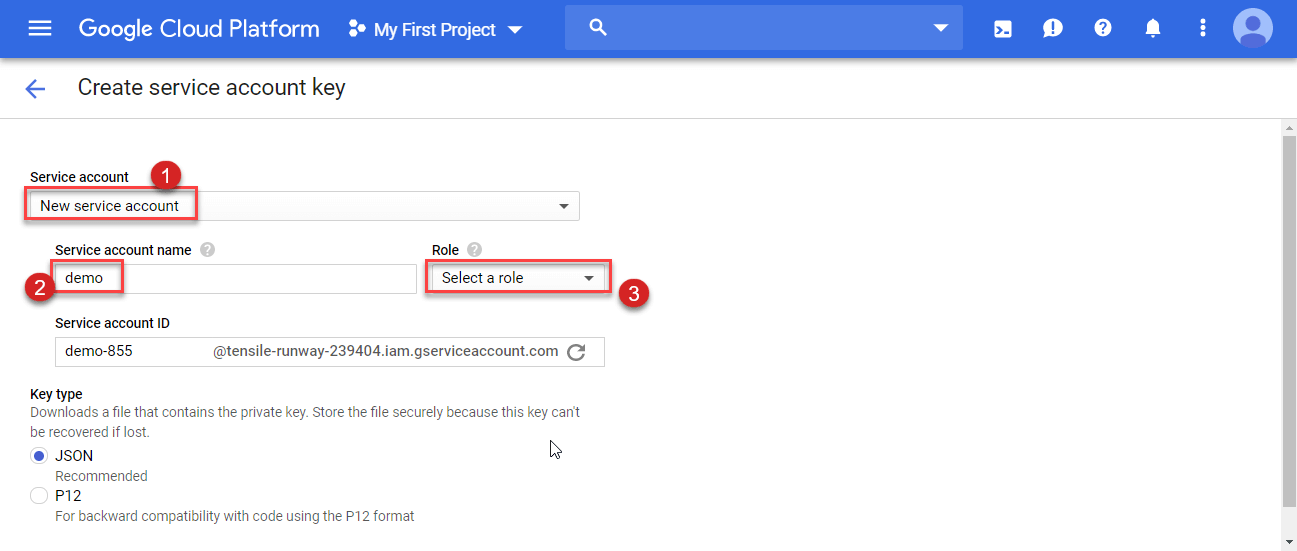
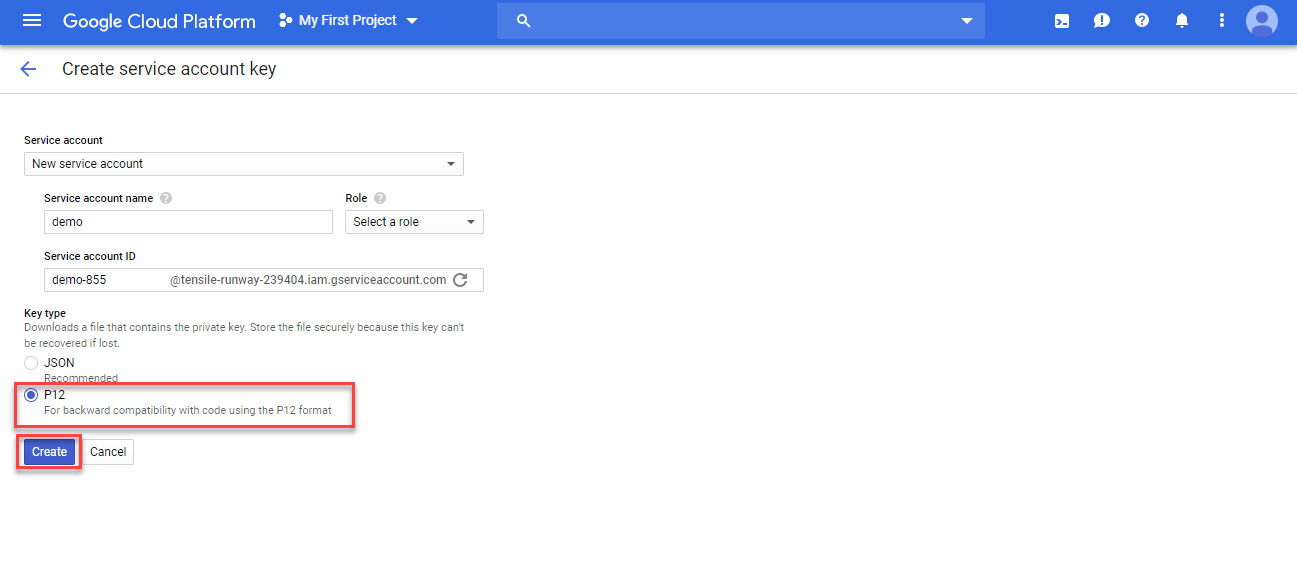
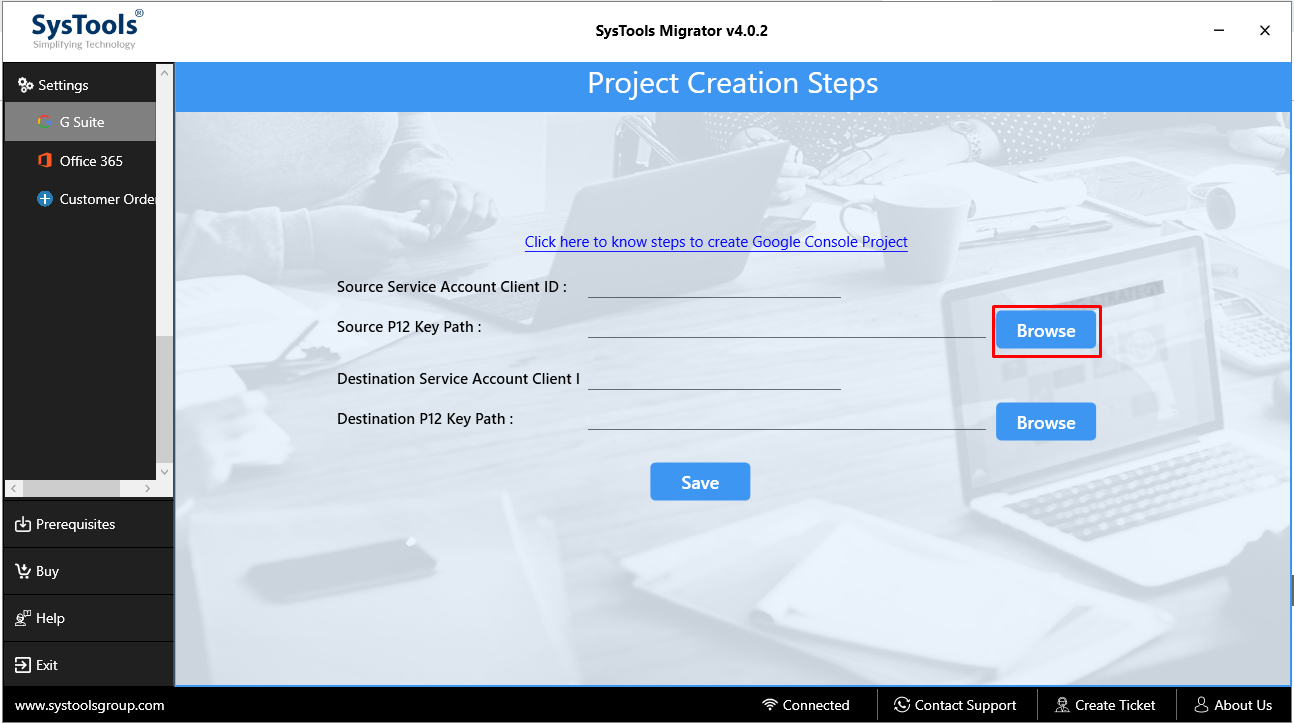
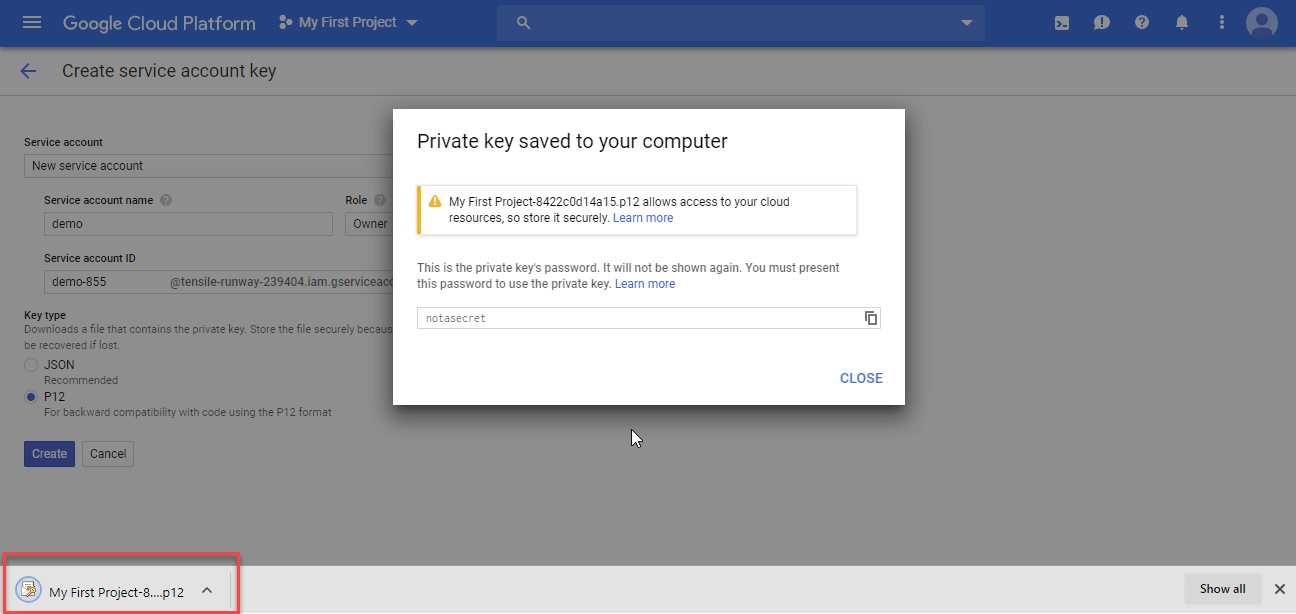
Download the P12 file and save securely in your local system. This is the p12 file which you need to browse within Migration Tool ( as shown in Step 19).

Download the P12 file
STEP 10

Select the Mange service account from the right hand side of the Credentials tab.

Mange service account
STEP 11

After that select your new service account and click on the Edit option from Actions column.

edit service account
STEP 12

Click on the SHOW DOMAIN-WIDE DELEGATION option under the Service account details.

Show Domain-Wide Delegation
STEP 13

Then check the box for Enable Gsuite Domain-wide Delegation.

Enable Gsuite Domain-wide Delegation
STEP 14

Provide any Product name for consent screen and then click on the Save button to save the changes.

save changes
STEP 15

Click on the View Client ID to see the client ID corresponding to the new service account.

View Client ID
STEP 16

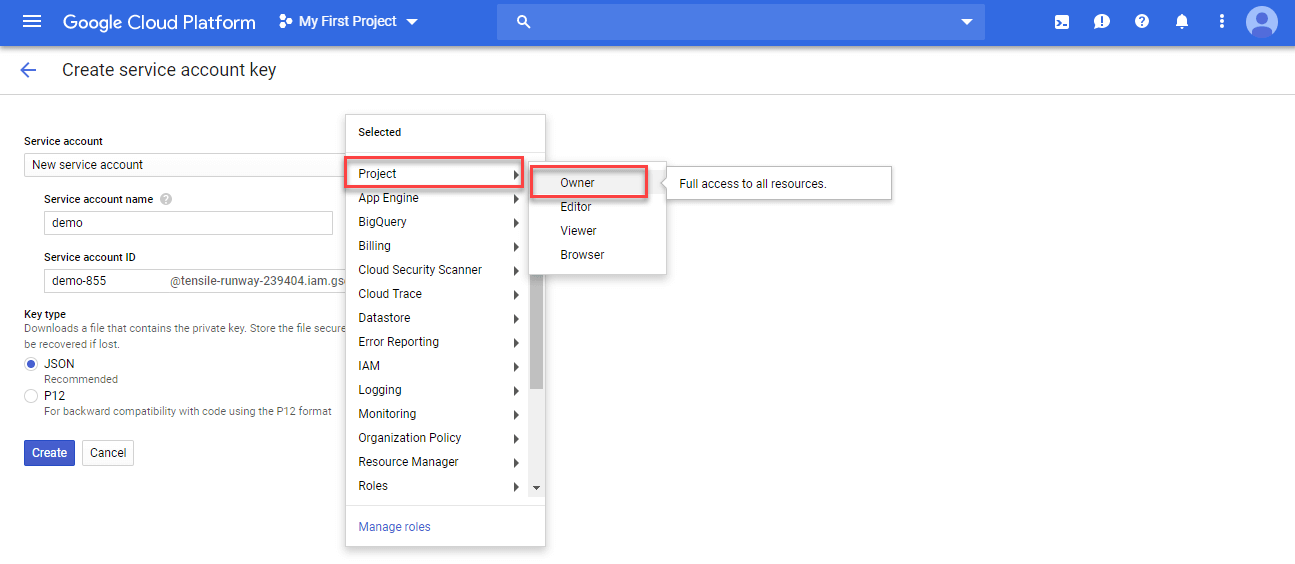
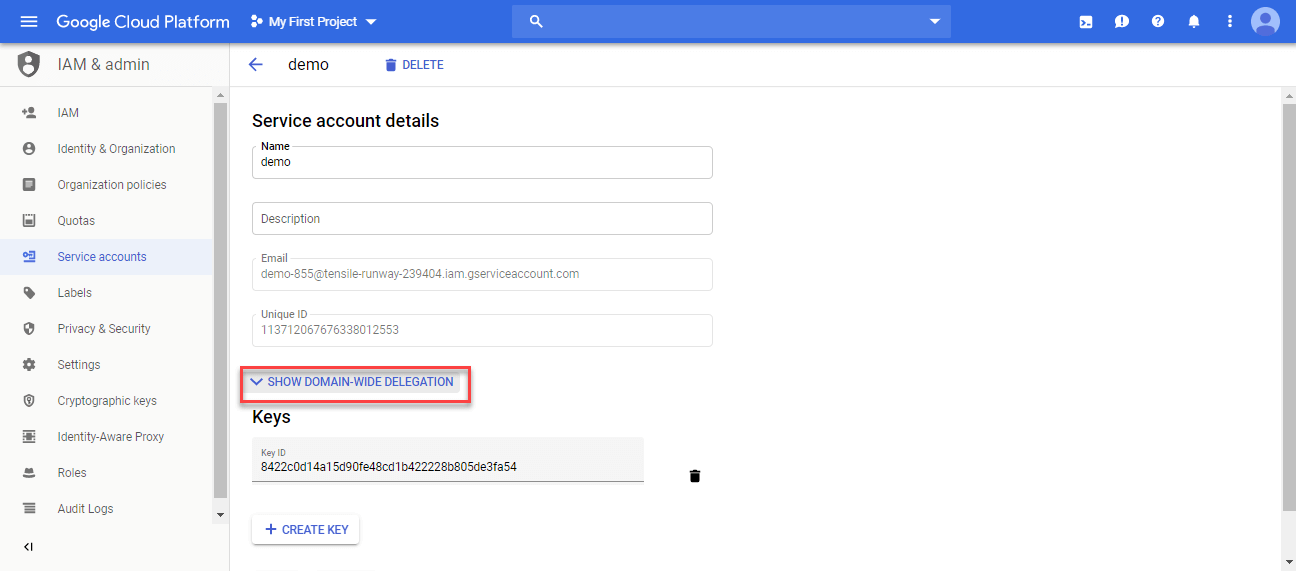
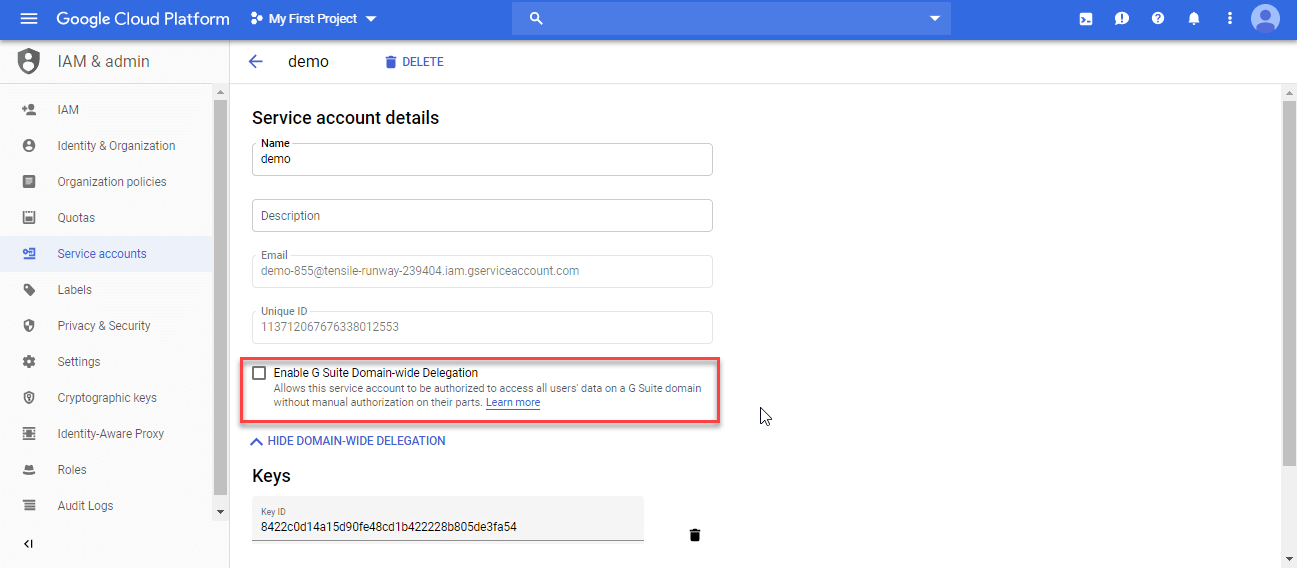
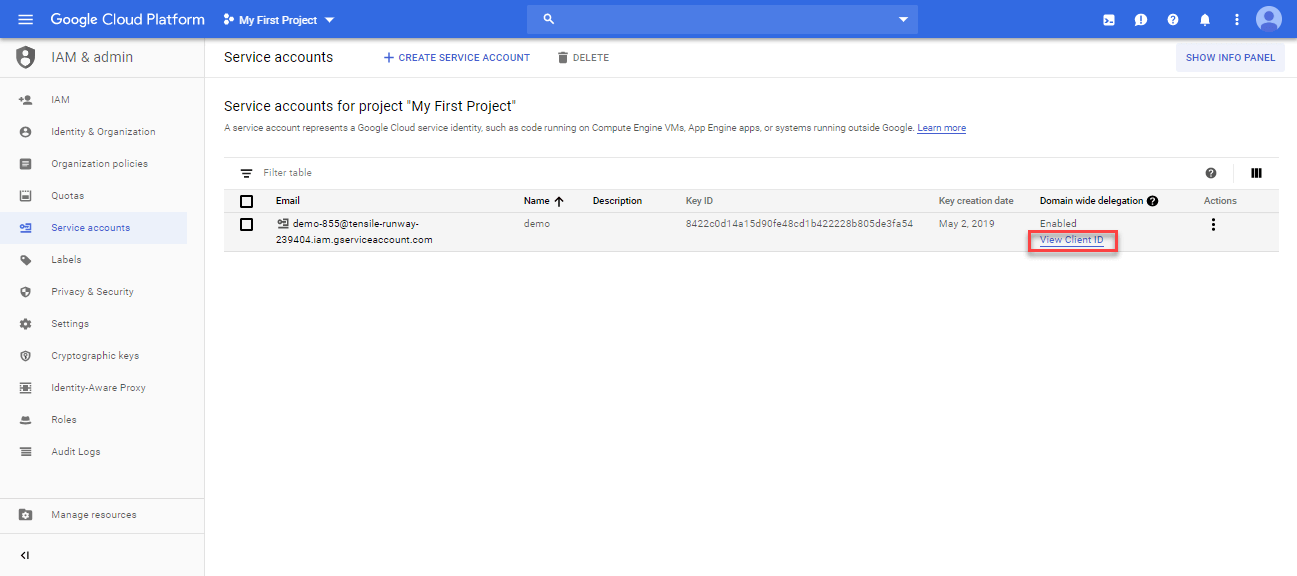
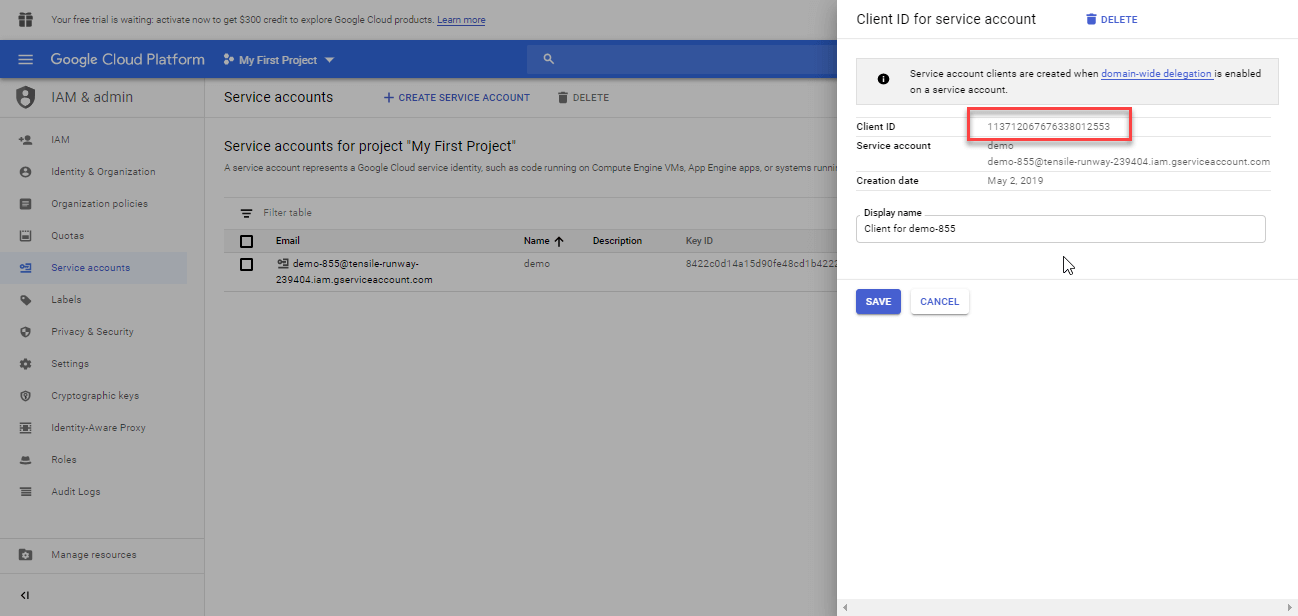
Copy this Client ID to provide domain wide delegation to the Migration Tool. Client ID is important during migration process. User need to give this ID as Service Account Client ID in the Migration Tool ( as shown in Step 19).

 Copy the Client ID

Enable APIs in Google Cloud Console


STEP 17

Now again go to the APIs & Services menu of the Google Cloud Console and select Library option.

 Library option


STEP 18

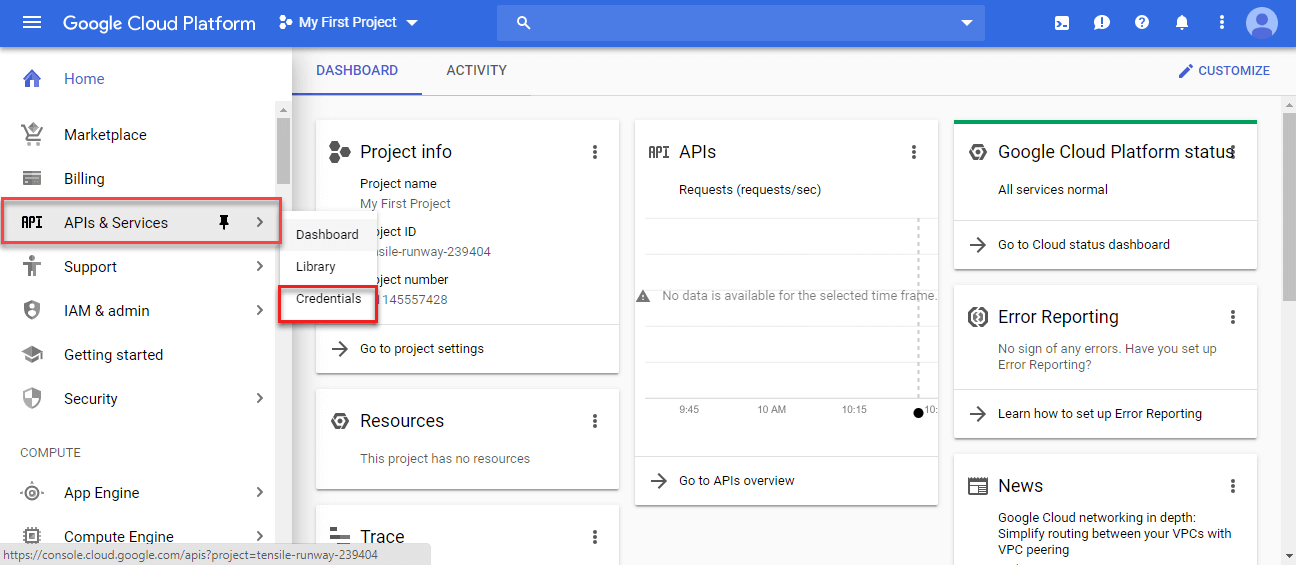
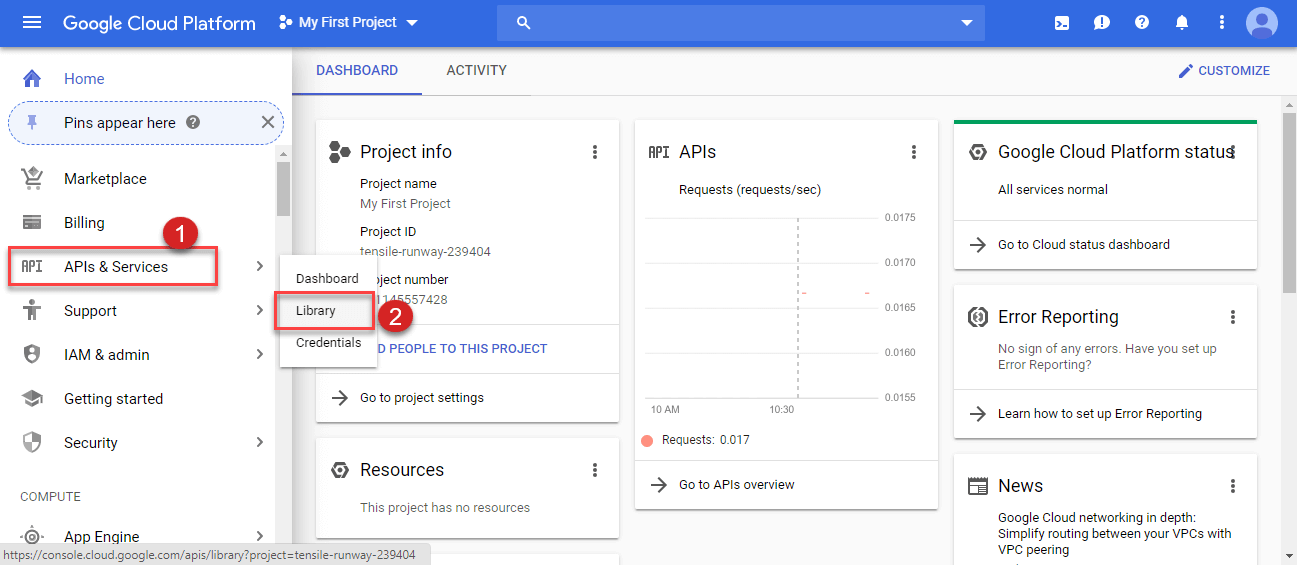
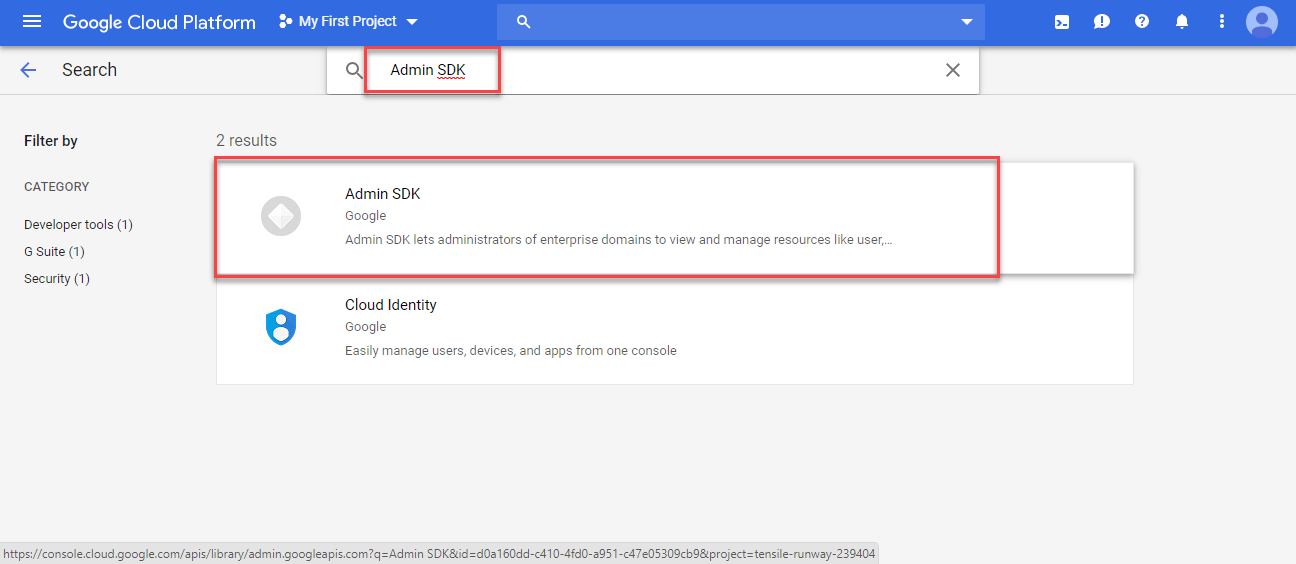
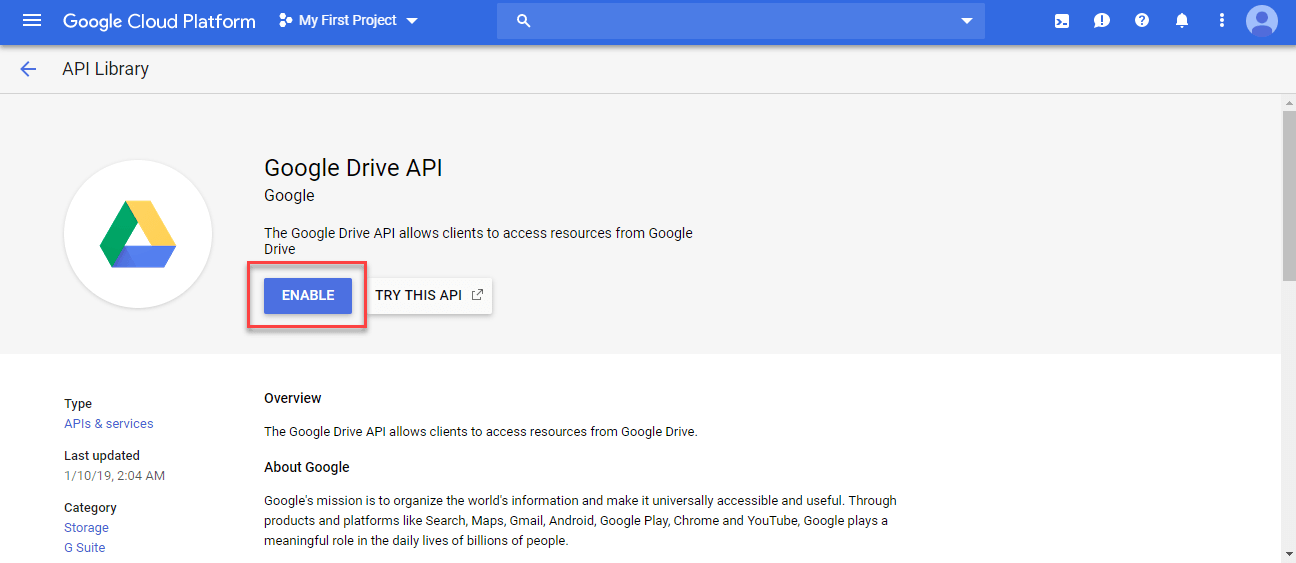
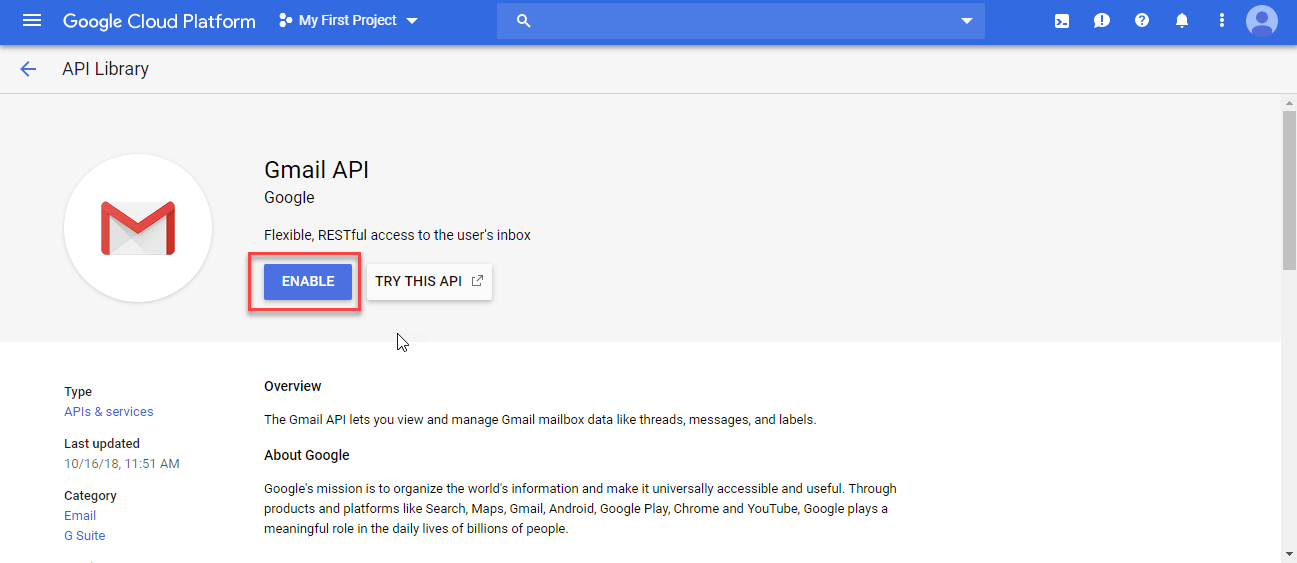
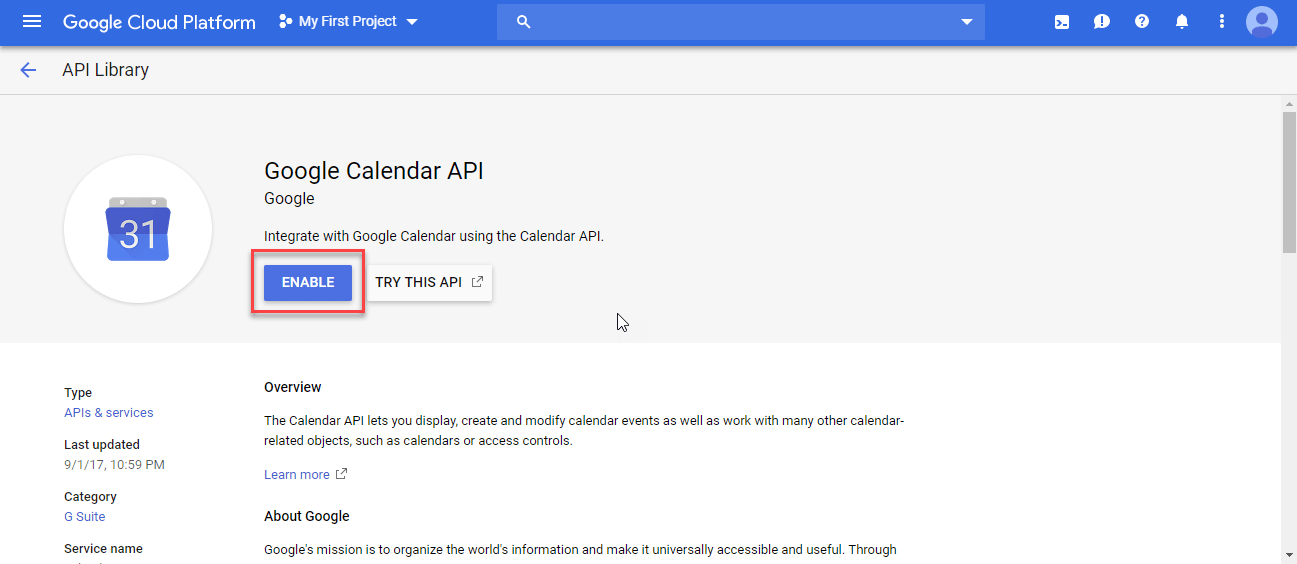
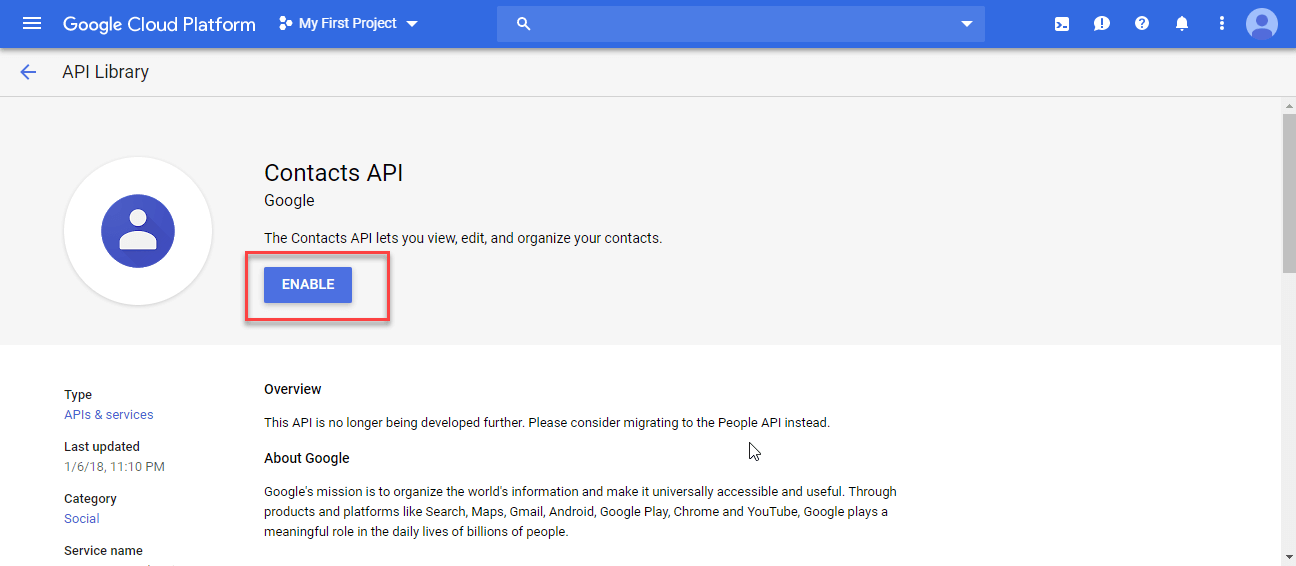
Before starting the migration process you need to enable number of APIs. To enable the APIs select the API and click on the Enable option. You can use search option to easily find the APIs.

The APIs are:

  • Admin SDK
  • Drive API
  • Gmail API
  • Calendar API
  • Contacts API

Enable Admin SDK API

enable Admin SDK


 enable Admin SDK 1


Enable Google Drive API

 Enable Drive API

Enable Gmail API

 Enable Drive API2


Enable Google Calendar API

 Enable Gmail API


Enable Contacts API

 Enable Google Calendar API


STEP 19

Go to Migration Tool Settings menu and select the Setup option. Then set the Client ID as the Service Account Client ID and browse the P12 key path from the saved location for both Source & Destination Account.

 Migration Tool Setup


Free Download G Suite to Office 365 Migration Tool Download Now